How to Flush Fertilizer Salts From Potted Plants
Fast & Easy
If your indoor plant suddenly looks scorched—brown tips, crispy edges, or white soil residue—you’re not alone. I’ll walk you through the exact signs of Fertilizer Burn & Salt Buildup, then show you how to fix it with flushing salts from potted plants in a calm, step-by-step way.
Let me guess—one day the leaves look fine, and the next they have that unmistakable “baked” look: Fertilizer Burn & Salt Buildup. As an indoor-plant person who’s helped friends rescue dozens of container plants (and watched a few overzealous fertilizing moments in my own home), I can tell you the most painful part isn’t the damage—it’s the worry that you did something wrong.
The truth is kinder. In pots, salts from fertilizers and hard water can build up, especially when you feed on a schedule that doesn’t match the season, the plant’s growth cycle, or your pot’s drainage pace. When salts climb the soil, the roots struggle to take up water, and the leaf edges respond first—crispy, brown, and sometimes oddly crisp on the tips.
In this guide, I’ll show you how to spot the symptoms, then walk you through flushing salts correctly so your plant can breathe again. I’ll also share prevention tips that work in both the US (USDA hardiness zones and frost-date logic) and Europe (temperature + frost timing), so you’re not repeating this every winter.
What You’ll Be Able to Do After This
Identify fertilizer burn vs. other causes using clear, realistic signs.
Flush fertilizer salts safely with a method that’s fast, gentle, and pot-friendly.
Prevent salt buildup with a simple indoor feeding + watering routine you can actually stick to.
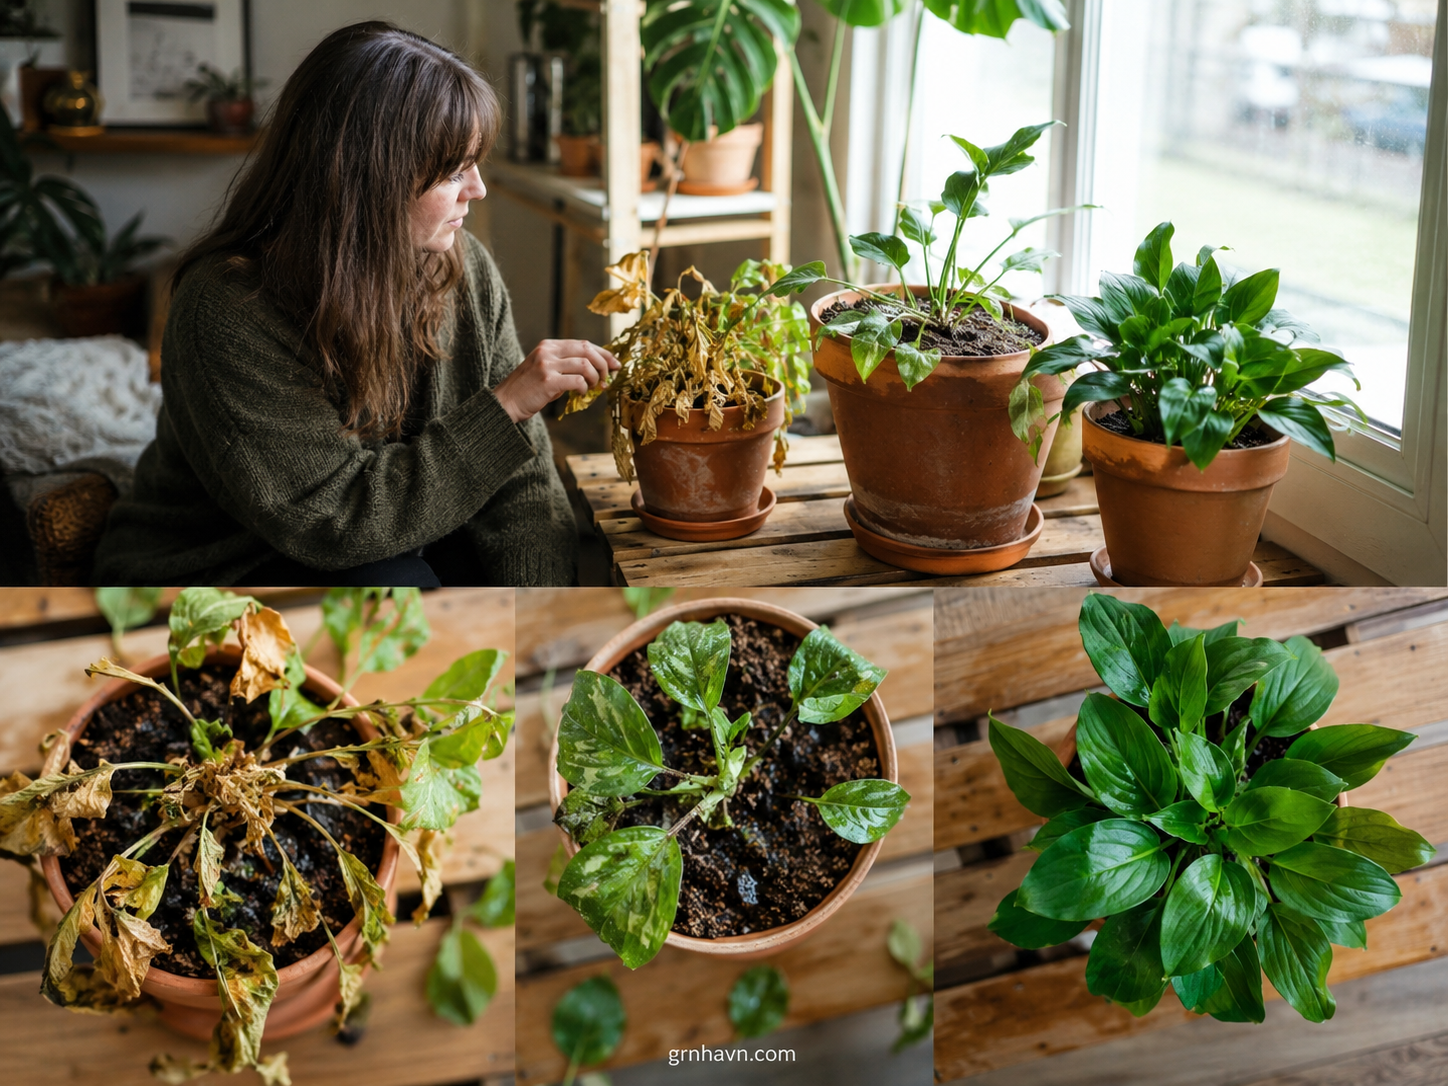
What Fertilizer Burn Looks Like
The first time you notice it, it can feel personal—like you “caused” the problem. But fertilizer burn is usually a predictable reaction to salts at the root zone. In my experience, it shows up most clearly on the youngest, most actively growing edges because that’s where stress reveals itself fast.
Look closely. Are the leaves starting to look a little “crispy,” with color fading from the tips outward? That’s your clue. Below are the most common visual tells I’ve seen across everything from pothos and philodendrons to peace lilies in window-heavy homes.
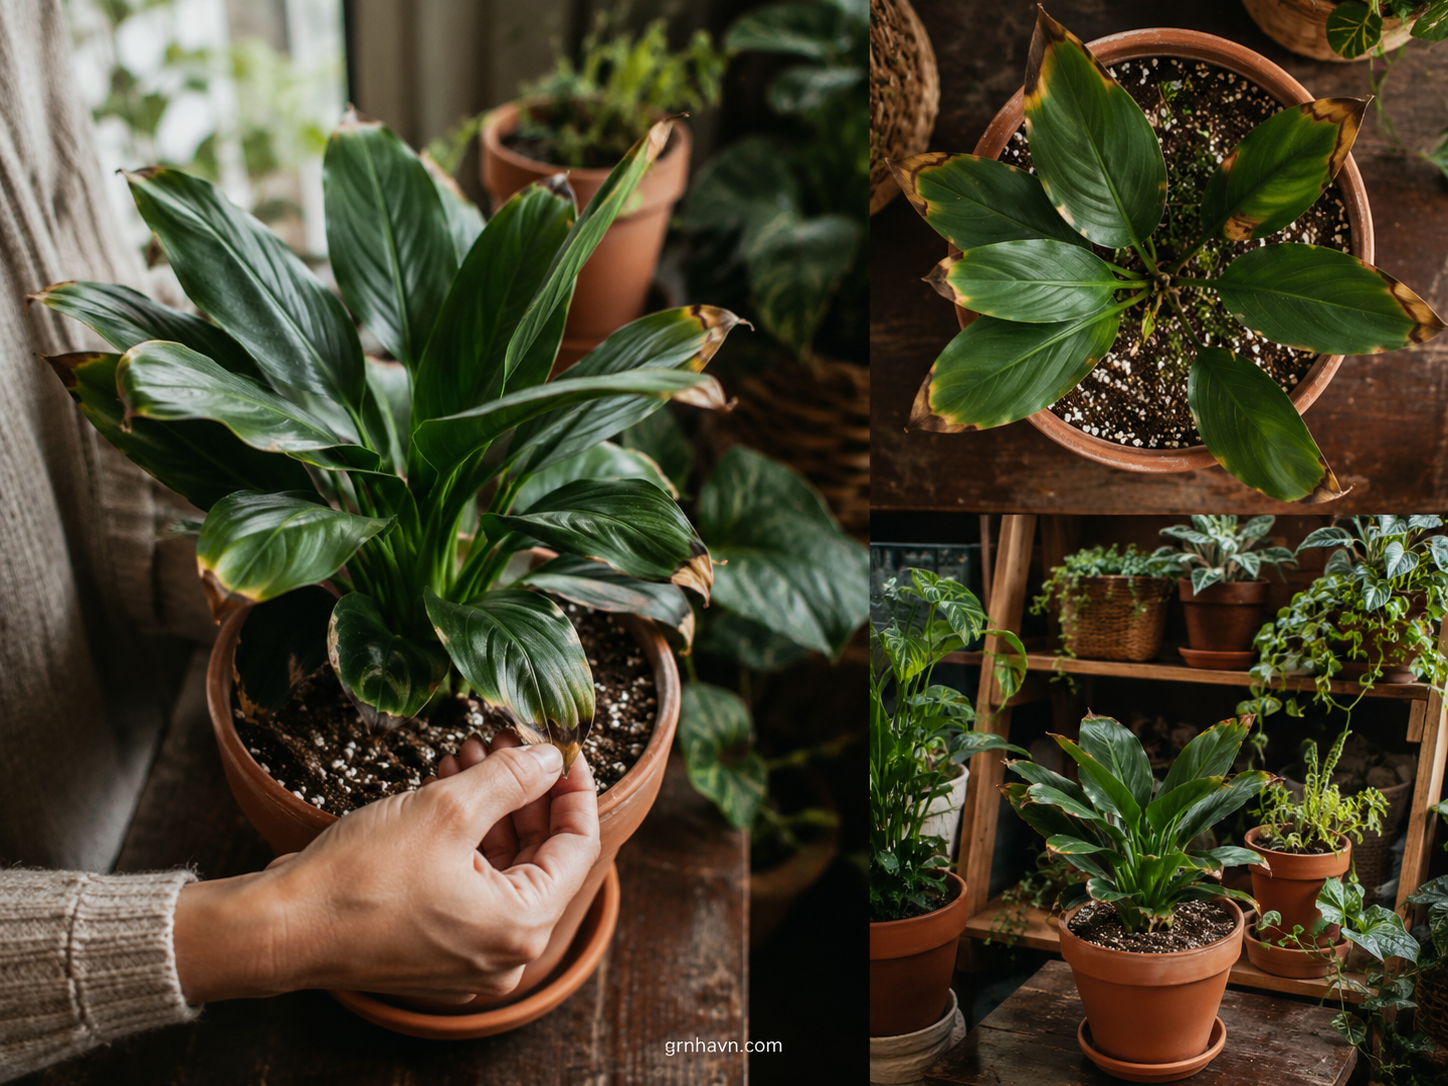
Brown leaf tips/edges
Brown tips or edges that look dry (not mushy) are a classic sign. The pattern often begins at the tip and works along the margin. Sometimes it looks like a thin scorched border—like the leaf tried to cope and simply ran out of usable water.
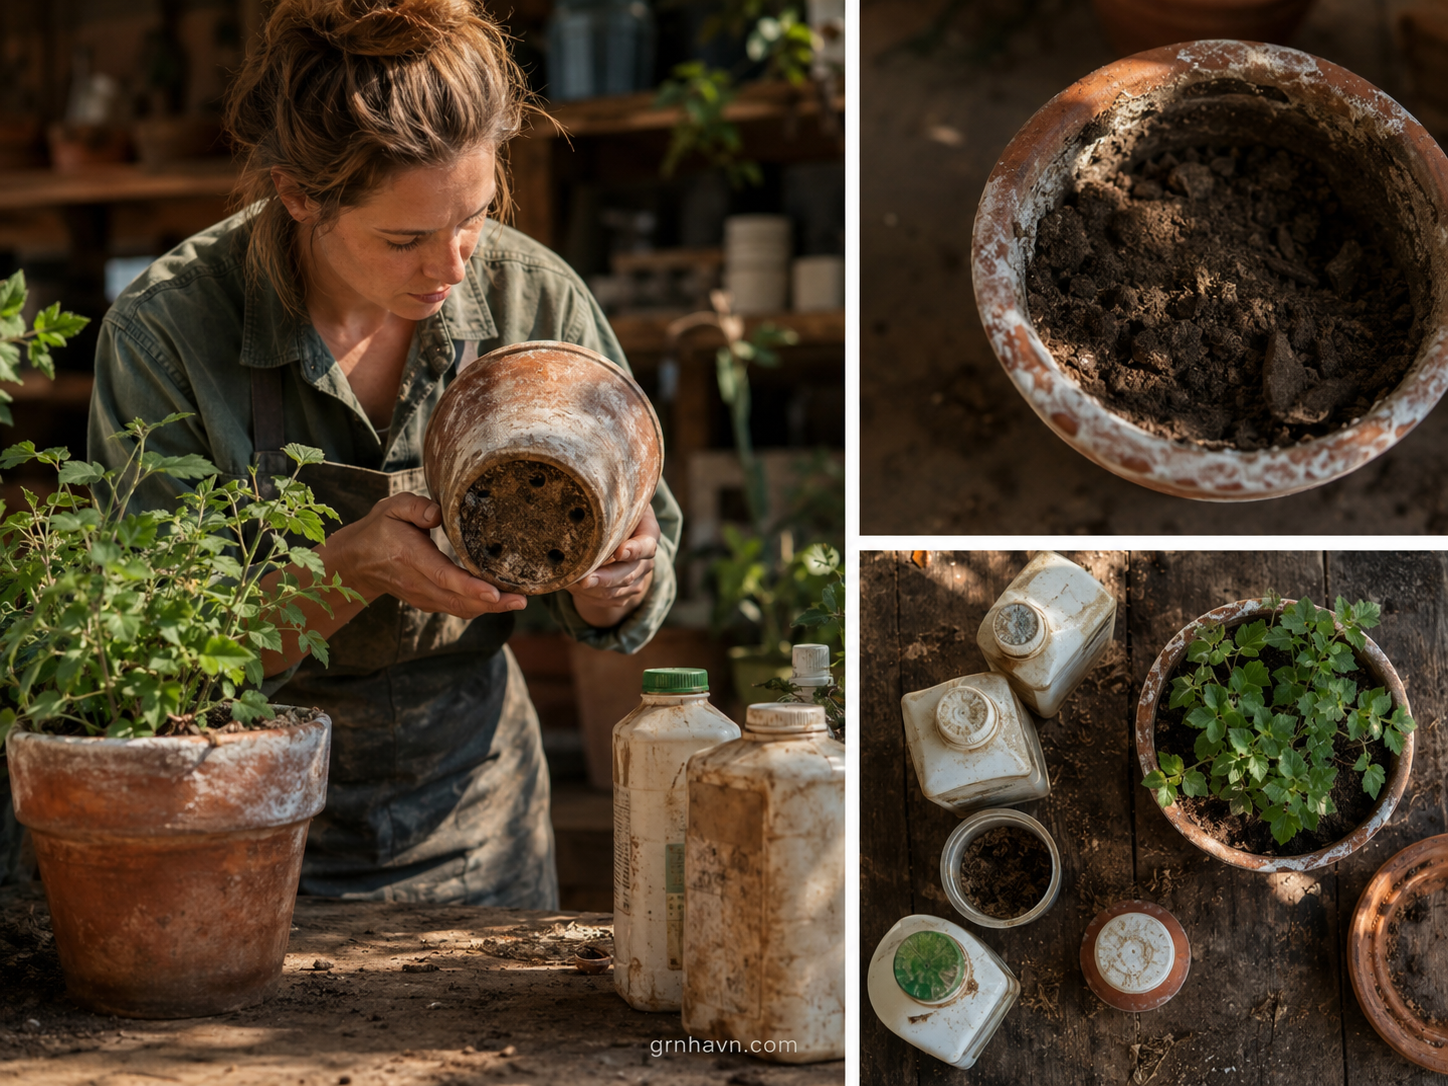
Soil salt crust and white residue
Check the surface of the potting mix. Salt buildup in pots often appears as a white, dusty film, tiny crystals, or a faint crust near the rim. In homes with harder water, this can show up even faster. If you gently wipe it away and it comes right back, you’re likely dealing with ongoing salt accumulation.
Why Fertilizer Burn Happens In Containers
Here’s the part most people miss: in a garden bed, salts can disperse into the wider ground. In pots, salts stay put. Even when you’re “feeding correctly,” container plants can accumulate residue over time—especially if you water in a way that doesn’t flush the bottom.
Overfeeding and wrong dilution
Fertilizer burn is often the result of too much nutrient concentration or too-frequent dosing. Liquid fertilizers are convenient, but if you accidentally mix stronger than the label (or double-feed “just to help”), salts can build at the root zone and stress the plant before you realize it.
Dry soil watering cycles
If the soil repeatedly dries out completely and then gets soaked, salts can concentrate as water evaporates. In my own house, I’ve seen this happen when plants sit a bit too close to a warm window or heater vent. The soil surface looks “fine,” but the chemistry is changing deeper down.
Poor drainage and salt accumulation
Drainage is the safety valve. If water can’t move through the pot, salts remain in the root environment. Pots with no drainage holes, a blocked base, or compacted mix are prime candidates for salt buildup in pots— and eventually fertilizer burn.
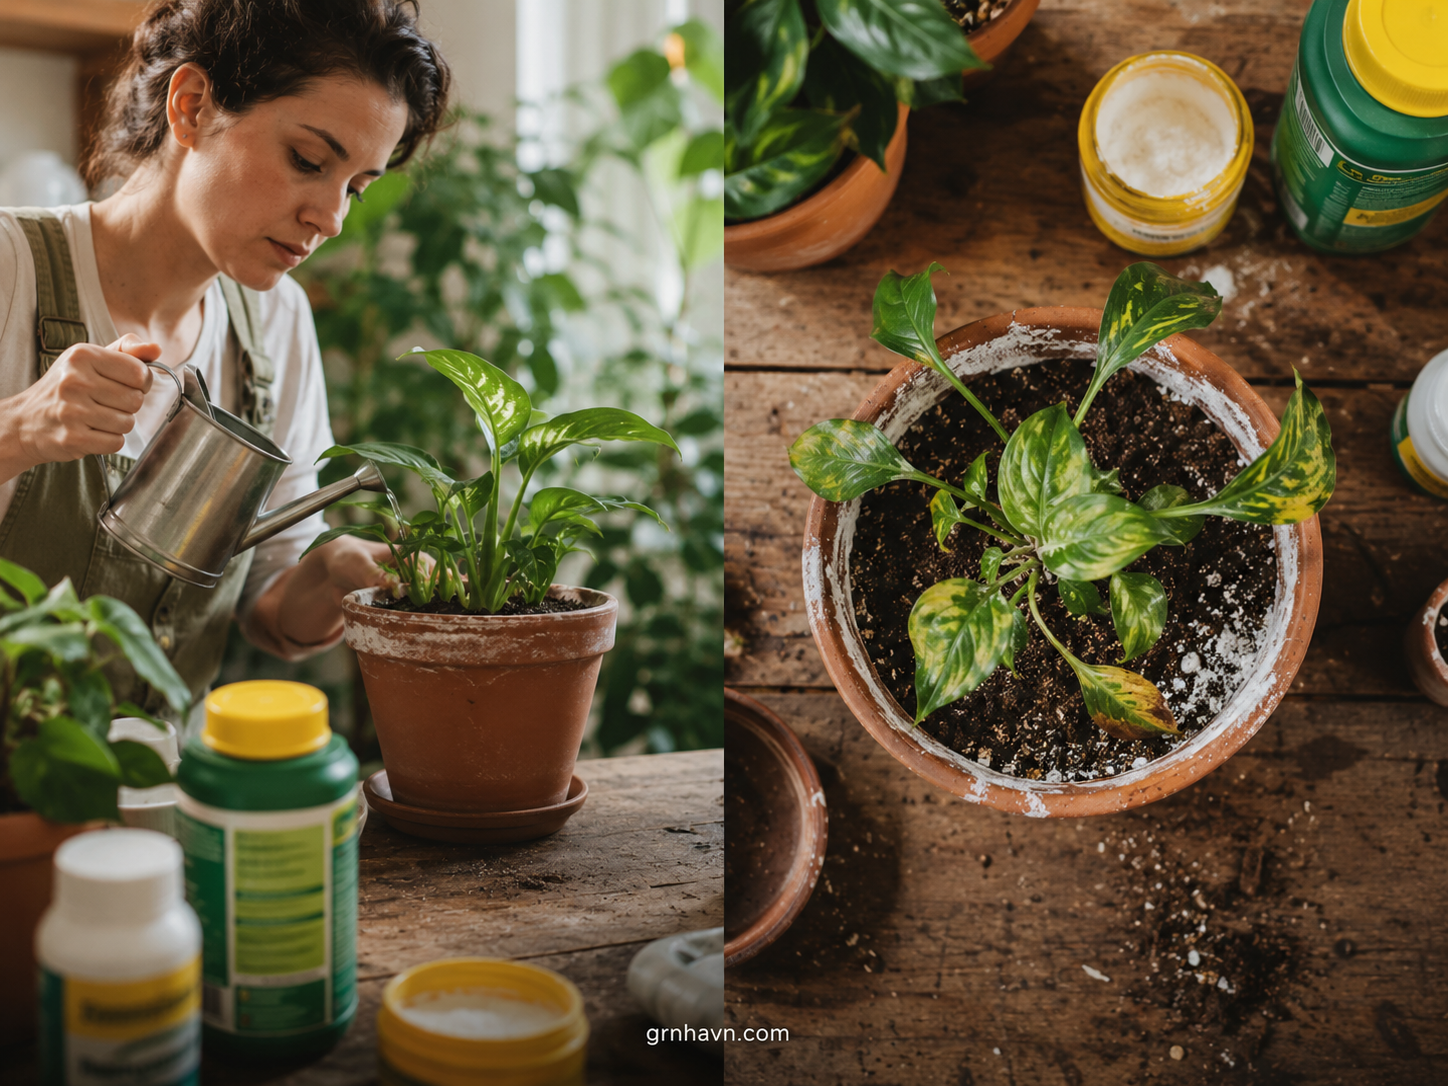
How To Fix Fertilizer Burn (Step-By-Step)
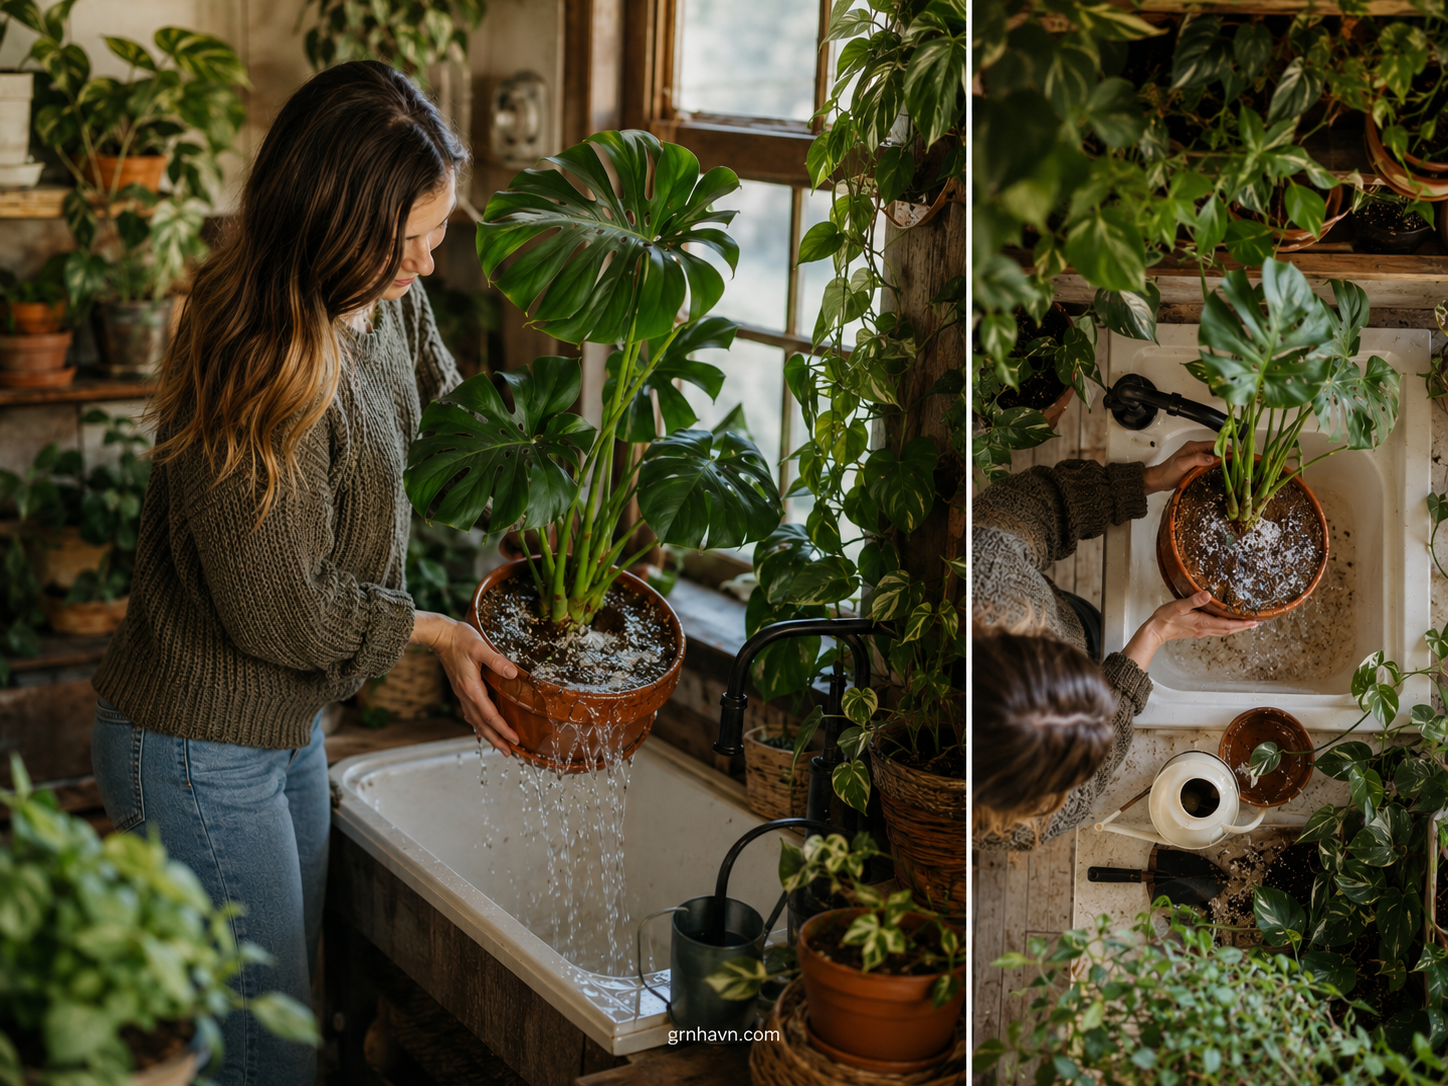
The good news? Flushing salts from potted plants is often the fastest “reset” you can do. I treat it like a gentle cleanse: you’re not punishing the plant—you’re removing residue from the root zone so water can do its job again.
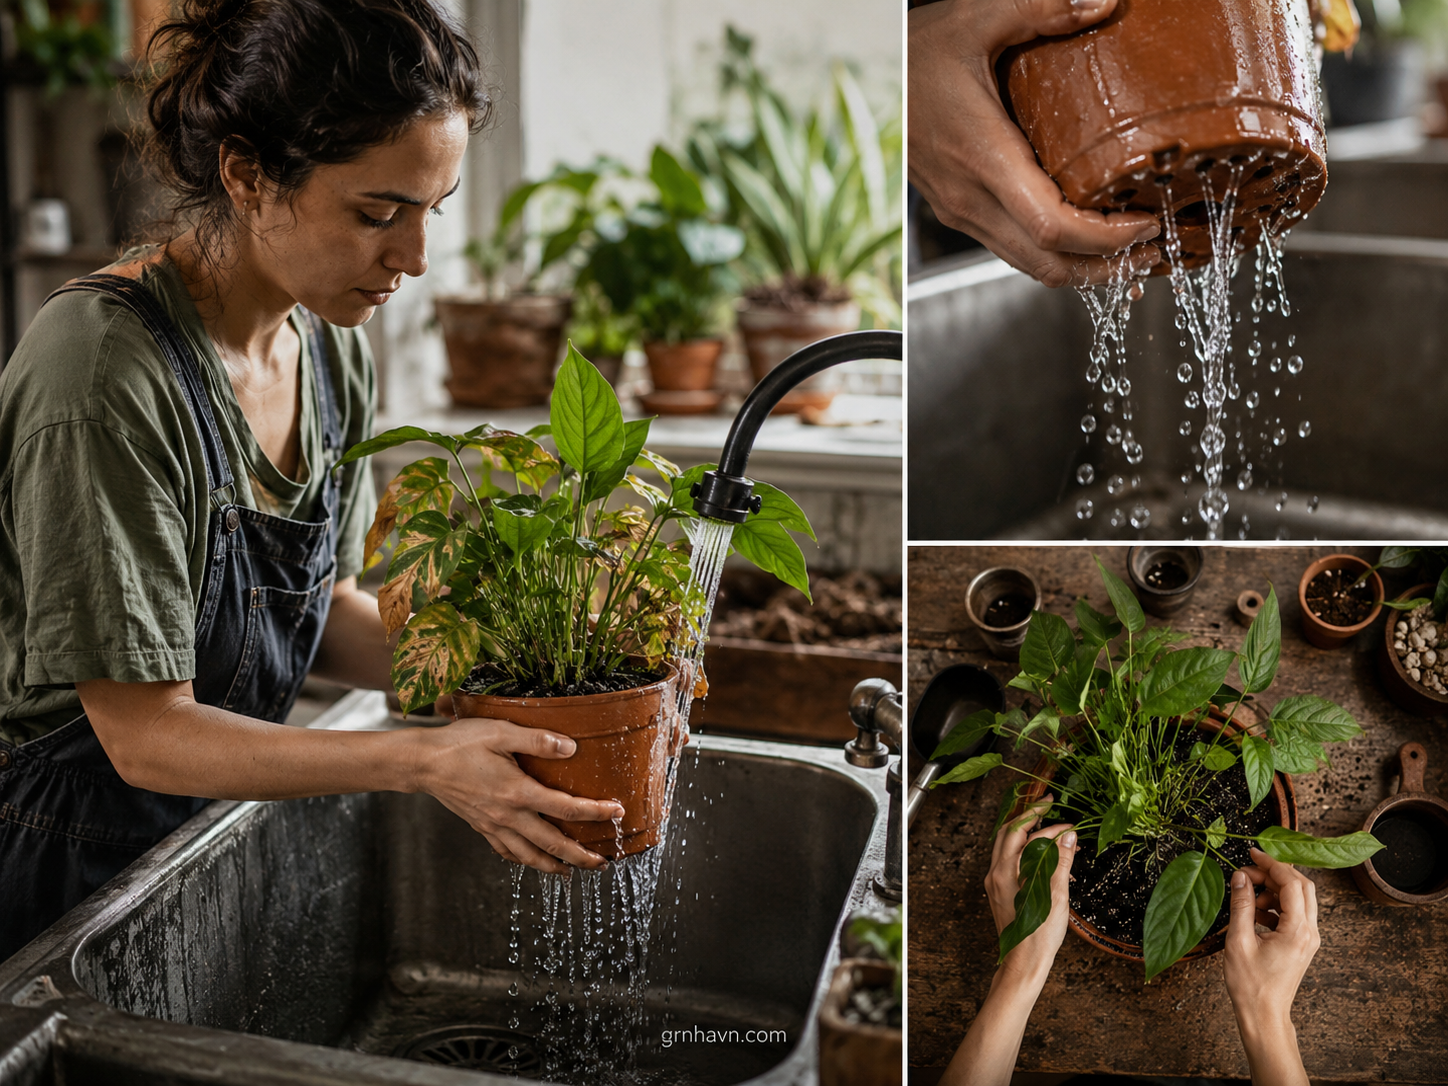
Flush salts correctly
Take the pot to a sink or tub. Water slowly with clean water (ideally room temperature). Continue until water runs freely out the drainage holes. Don’t rush it—slow flushing gives water time to carry salts downward and out. If you use tap water, that’s okay; just be consistent and keep the flush gentle and thorough.
Pause feeding for 1–2 weeks
After you flush, stop fertilizer for 1–2 weeks. This is where patience earns trust. The plant may still look “burnt” at the leaf edges, but new growth should begin to look healthier as the root zone stabilizes.
Check roots (when needed)
If the plant worsens, smells sour, stays soggy, or growth doesn’t rebound, then it’s time to inspect roots. You don’t need to repot immediately—just assess. Healthy roots look firm and active; problematic roots can be mushy or dark. If roots are struggling, repot into fresh, well-draining mix and be extra careful with watering after.
You can usually find a good watering can (or a small spout sprayer) at a garden center, nursery, home improvement store, or even a local neighborhood shop. For flushing fertilizer salts, the key is control—slow, steady watering helps water carry salts downward without shocking the plant.
If you’re choosing one, look for a narrow or fine spout and a comfortable handle. A “misty” sprayer can help start the flush evenly, but you still want a steady stream to get good drainage out of the bottom.
For quick, hassle-free shopping, check the options below on Amazon and compare picks side-by-side so you can select what feels right for your indoor setup.
Prevention Checklist For Indoor Gardeners
The easiest way to avoid repeating this is to treat fertilizer like seasoning—not a main meal. Indoor plants often grow slower in low-light months. So in both the US and Europe, you’ll want your feeding to match the season, not your calendar alone.
Feed schedule and dose control
When days shorten, growth slows. In the US, consider USDA hardiness zone timing alongside your frost-date logic: once temperatures drop and indoor light weakens, reduce fertilizer frequency and dilution. In Europe, use your frost/temperature pattern—when outdoor conditions are cold and indoor light is naturally dimmer, back off feeding.
Watering strategy
Water thoroughly, then let the top portion of the soil dry slightly before watering again. The goal is consistency—avoid long dry spells followed by heavy re-watering cycles, which concentrate salts near the surface.
Flush occasionally (when/why)
If you’re in hard-water areas or you fertilize regularly, plan a light flush every few months (or whenever you notice residue). Flushing helps prevent salt buildup in pots from sneaking up on you.

When It’s Not Fertilizer Burn
This is my honest best-friend moment: sometimes people flush “just in case,” and the plant still struggles. That doesn’t mean flushing was wrong—it means the cause might be something else (or fertilizer burn could be layered with another issue).
Light stress
Too much direct sun can bleach leaves and scorch tips. If the plant sits in a harsh window and the damage matches sun exposure, light stress may be the main driver.
Overwatering issues
Overwatering can cause decline that looks similar at first—edges may brown—but the underlying problem is different. Overwatered soil is often staying wet too long, with less oxygen for roots. Check drainage and feel the soil depth, not only the surface.
Quick diagnostic tip: if you see white residue, salt crust, and crisp margins that appeared after feeding, fertilizer burn & salt buildup is likely. If the soil is consistently soggy and there’s no residue, focus on watering and drainage first.
FAQ
1. What does fertilizer burn look like on leaves?
It often starts with brown leaf tips or crisp edges that feel dry rather than mushy. You may also see yellowing near the margin, and the damage can appear after feeding or when residue builds up over time.
2. What causes fertilizer burn in potted plants?
Usually it’s too much nutrient concentration (wrong dilution or overfeeding), salt buildup in pots from repeated dosing, hard-water accumulation, and watering patterns that let salts concentrate near the surface—especially when drainage is weak.
3. Is salt crust on soil always caused by fertilizer?
Not always. Hard water alone can leave mineral residue. But fertilizer burn & salt buildup often go hand-in-hand: fertilizer adds salts, and poor flushing or slow drainage lets them stay.
4. How do I tell nutrient deficiency apart from fertilizer burn?
Deficiency usually looks like overall pale growth or stunted new leaves, often spreading more evenly. Fertilizer burn tends to show scorch patterns—especially tips and edges—often with visible residue.
5. How do I flush fertilizer salts from potted plants?
Move the pot to a sink or tub, water slowly and thoroughly until it runs from drainage holes, then allow it to fully drain. Pause feeding for 1–2 weeks and watch for healthier new growth.
6. How long should I stop fertilizing after burn symptoms?
Typically 1–2 weeks after a flush is a good reset window. If residue keeps returning quickly, extend the pause and adjust feeding frequency.
7. Should I repot after fertilizer burn?
Not always. Repot when drainage is poor, soil is compacted, roots seem unhealthy, or symptoms worsen despite flushing. Fresh mix can help—especially if the old mix has trapped salts.
8. Can fertilizer burn be reversed?
The burnt parts usually won’t turn green again, but the plant can recover. The goal is to prevent further damage so new leaves grow clean and healthy.
9. Does poor drainage cause fertilizer burn faster?
Yes. When water can’t move freely through the pot, salts remain in the root zone longer, increasing stress risk and making burn more likely.
10. How often should I flush salts in indoor pots?
A practical rhythm is every few months, or sooner if you see residue/crust. If you fertilize often or use hard tap water, flushing may be needed more frequently.
11. Can overwatering contribute to fertilizer problems?
It can. Overwatering reduces oxygen around roots and can make stress harder to recover from. While fertilizer salts are the main burn driver, water issues often “team up” to slow recovery.
12. Should I remove burnt leaf tips?
You can trim clearly dead, crispy bits. Use clean scissors and avoid cutting into healthy green tissue. The plant will stop spending energy on the damaged area.
13. Can slow-release fertilizer also cause salt buildup?
Yes. Slow-release formulas can still accumulate salts over time, especially in small containers. With slow-release, flushing and occasional residue checks are still valuable.
14. What’s the best prevention routine for container plants?
Feed lighter in low-light months, water thoroughly then allow partial drying, ensure drainage, and flush occasionally. Match your routine to seasonal light and temperature shifts in your region.
15. When should I check the roots after suspected fertilizer burn?
Check roots if flushing doesn’t help after a couple weeks, if soil stays wet too long, or if the plant declines quickly. Early root checks prevent slow, hidden trouble from getting worse.
What Not To Do (Common Fertilizer Burn Traps)
I’ve watched too many people accidentally make things worse by trying to “fix” the plant too aggressively. Here are the moves I recommend avoiding—especially during the first 1–2 weeks after a flush.
Don’t: keep feeding while leaves are burning—pause first.
Don’t: repeatedly top-water small amounts that never reach drainage holes (that leaves salts behind).
Don’t: repot every time you see brown tips—inspect and decide based on roots and soil behavior.
Don’t: wait until spring to respond. If burn shows up now, act now; new growth needs time without added stress.
Late pruning can be tempting when leaves are ugly, but I prefer to trim only the clearly damaged tips after the plant stabilizes. That way, you protect healthy tissue and keep recovery energy focused where it matters.
Conclusion
When you understand fertilizer burn & salt buildup, the problem stops feeling mysterious. The “burn” is your clue that the root zone has become too salty—often from overfeeding, hard water, or watering that doesn’t flush. In my own case studies (and countless rescues from friends), the plants that rebound fastest are the ones that get a proper flush, a short feeding pause, and the drainage + watering routine that prevents salts from returning.
If you ever feel unsure, start with the simplest evidence: look for residue and check how your soil behaves. Then act gently. Your goal isn’t perfection—it’s recovery. With a calm reset, your indoor garden can return to that steady, lush rhythm you fell in love with.

Final Verdict
My best advice? Treat flushing salts from potted plants like a caring maintenance step, not a one-time emergency. In both US (USDA hardiness zones + frost-date logic) and Europe (temperature + frost timing), the rhythm shifts with light and season— so your feeding should shift too. When you match that rhythm, fertilizer burn stops being a recurring surprise and becomes a solvable, preventable hiccup.

Final Printable Checklist
- Spot the signs: crispy brown leaf tips/edges + soil salt crust or white residue.
- Flush salts correctly: slow, thorough watering until water drains freely from the bottom.
- Let it fully drain—never leave the pot sitting in runoff.
- Pause feeding for 1–2 weeks to let the root zone reset.
- Check roots if the plant worsens or stays soggy (mushy/dark roots = trouble).
- Prevention: reduce fertilizer in low-light seasons; match feeding to your winter light.
- Water strategy: water thoroughly, then allow partial drying before watering again.
- Flush occasionally if residue returns or if you use hard tap water.
- Trim only clearly dead tips after stabilization (avoid over-pruning while stressed).