Mulching Guide For Fall & Winter: Depth, Types & When to Apply
“In fall, mulch isn’t just protection—it’s a quiet promise you make to your garden for the days it can’t speak.”
Mulching Guide For Fall & Winter is one of those gardening moments where the work feels small… until you see what it saves. When I help neighbors across both America and Europe, the story is always the same: the best results don’t come from buying more— they come from choosing the right mulch and applying it at the right time. That’s why this guide focuses on the Best Mulch Types for Garden Beds, with climate-smart advice for frost and moisture balance.
In the US, we think in USDA hardiness zones. In Europe, we think more in temperature patterns and frost timing. Either way, the goal is gentle consistency: insulation without suffocating, moisture control without inviting rot, and a clean spring restart.
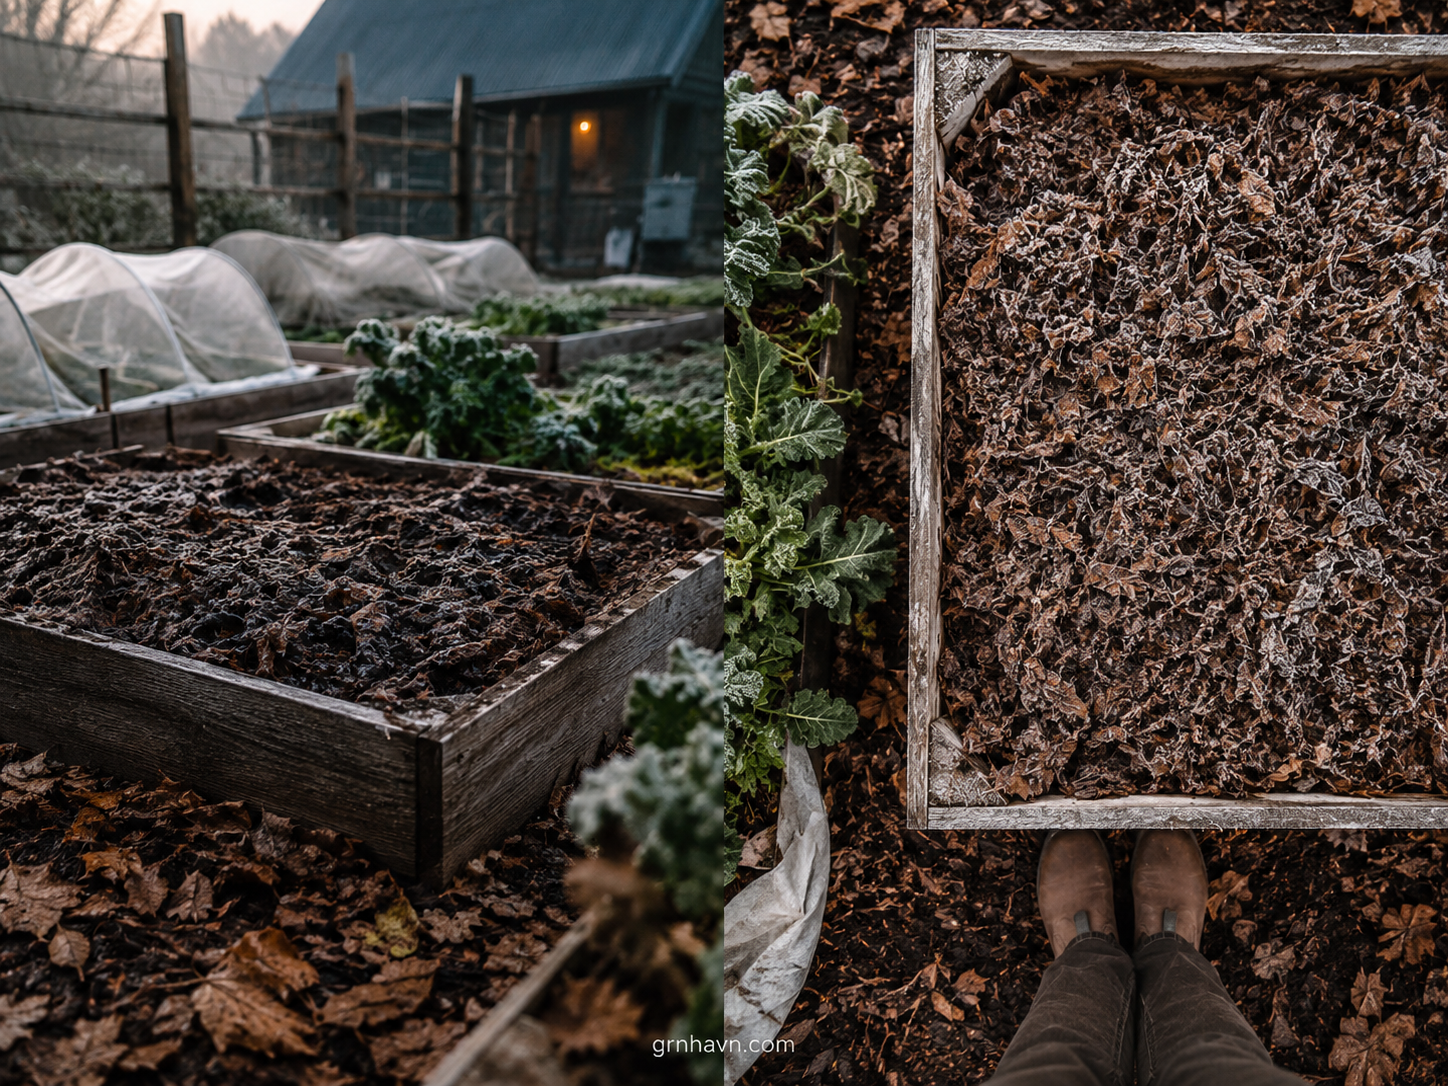
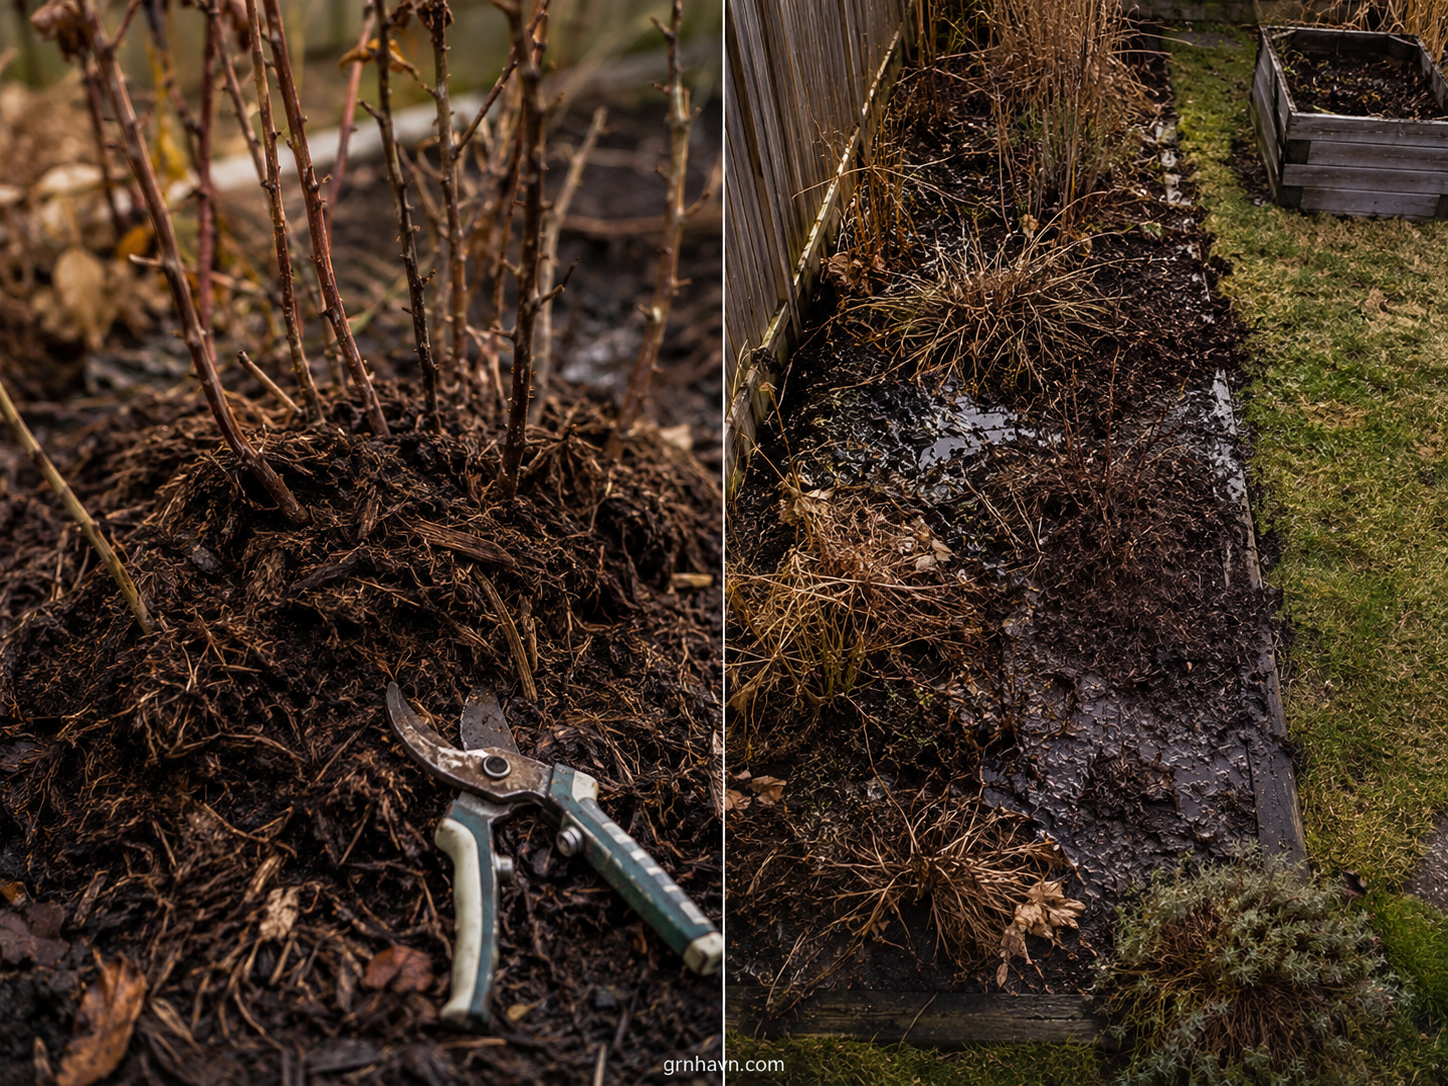
I’ll share what I’ve learned from real seasonal “before/after” moments— including when I’ve seen organic mulches thrive, when they became weed magnets, and when inorganic choices saved beds during especially wet winters. You’ll also get a simple thickness rule, safe application steps (so crowns stay happy), and a spring refresh plan that keeps everything looking intentional—not neglected.
Your Fall + Winter Promise (The Warm, Practical Kind)
- Choose the best mulch types for your garden beds—organic or inorganic—without guesswork.
- Get the right depth (2–4 in / 5–10 cm) and learn how moisture changes everything in heavy wet winters.
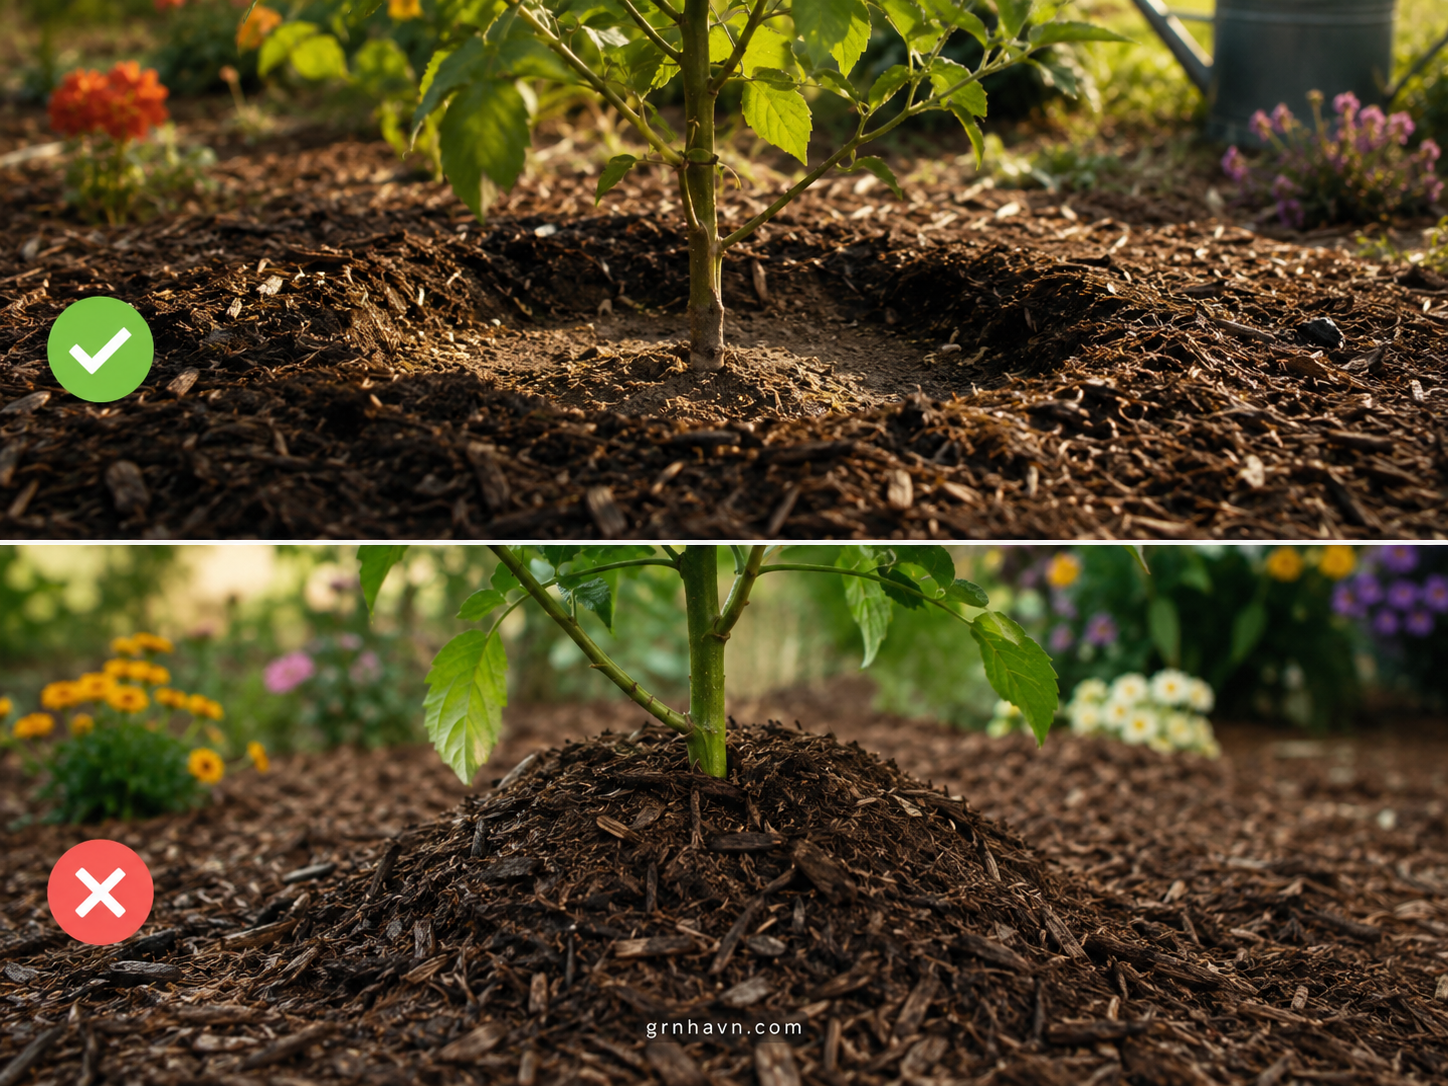
- Apply mulch so plants breathe: leave a gap around the crown/stem.
- Time it using US zone logic + Europe frost/temperature reality, then refresh in spring.
Typical mulch depth
2–4 in (5–10 cm) for most garden beds.
Timing rule
Mulch before deep frost—often after the first frost signals consistency.
Plant safety
Leave a gap around crowns/stems to prevent rot.
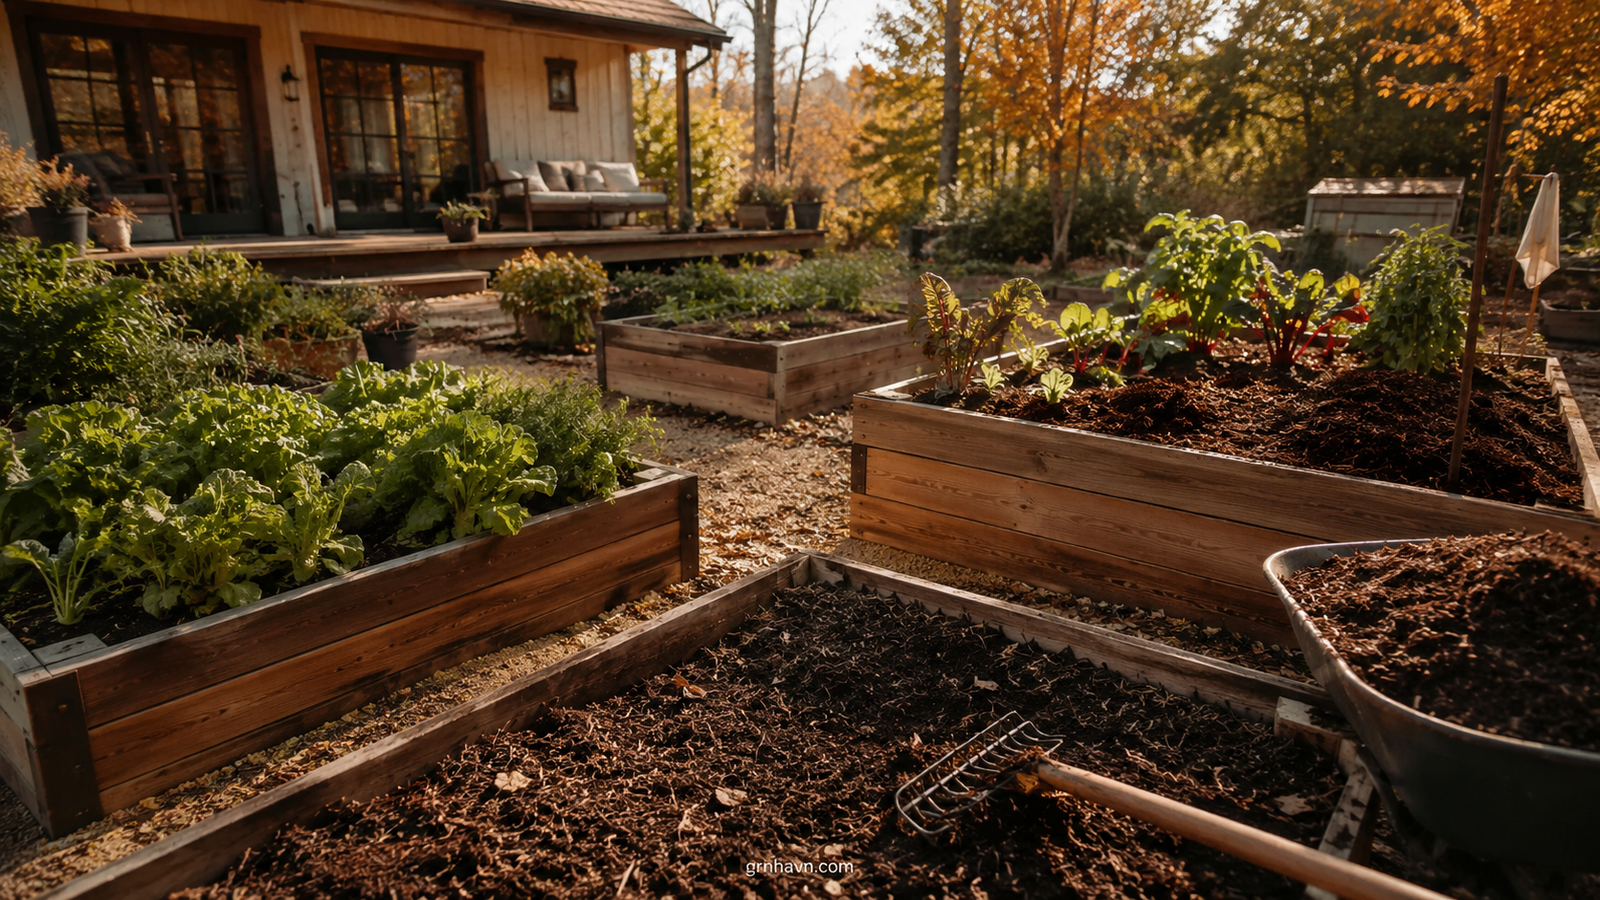
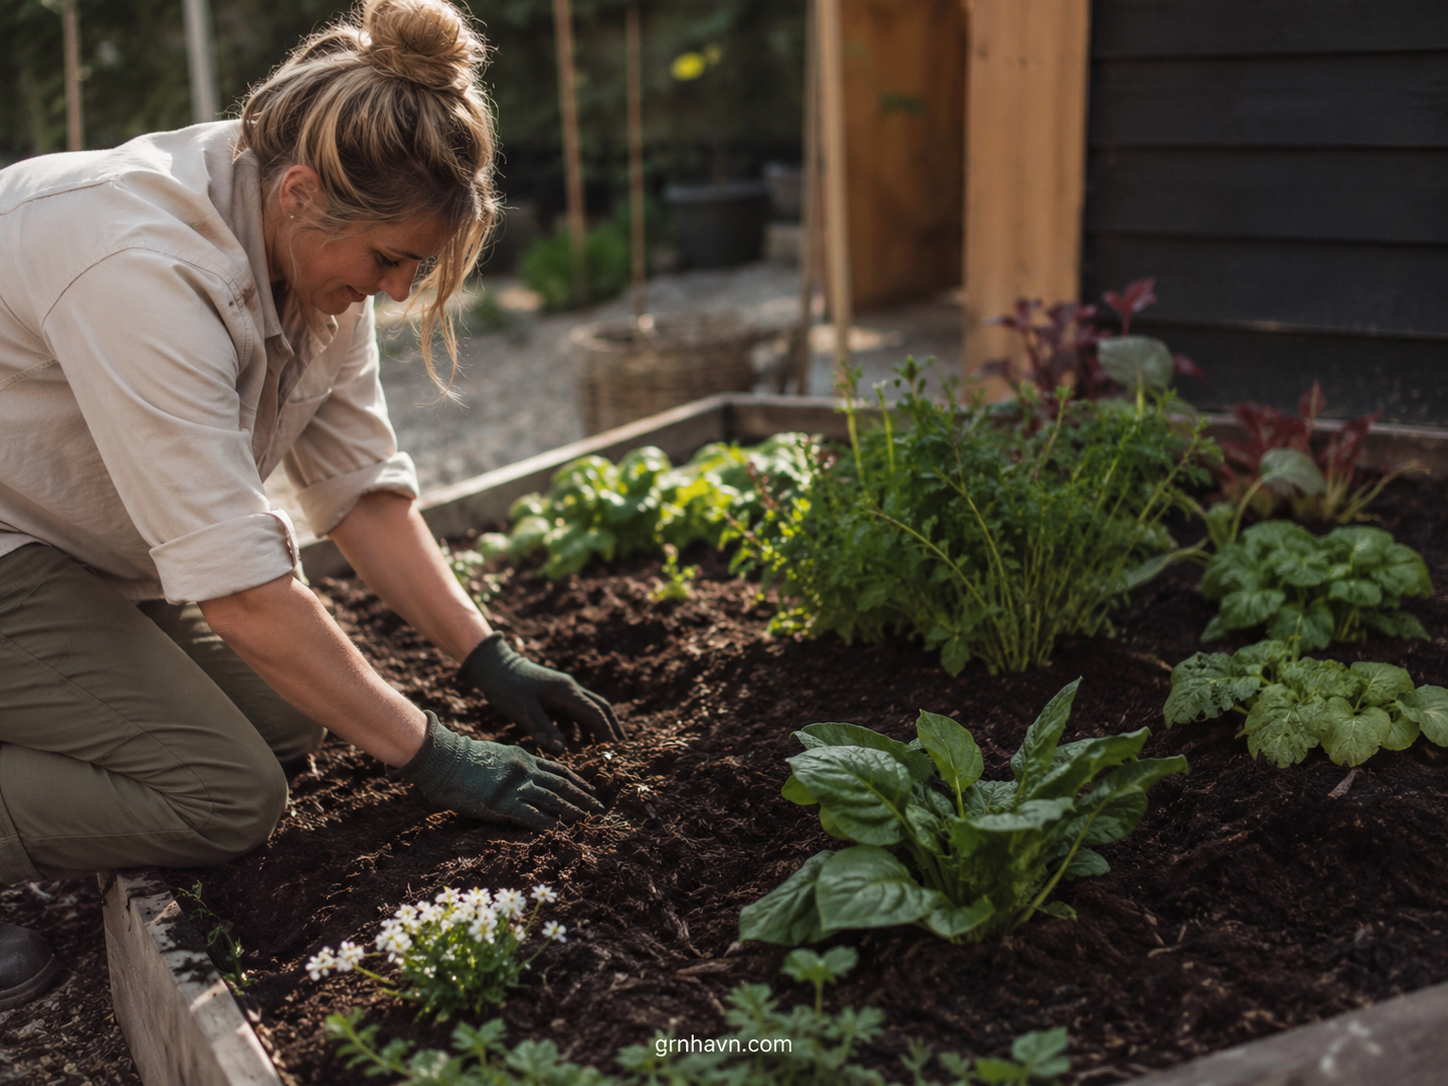
(Replace with your hero/featured photo. Required ratio: 16:9, optimized for mobile.)
Choosing Mulch By Climate (Frost + Moisture Balance)
The moment I learned to stop treating mulching like a “one-size rule,” everything got easier. Frost doesn’t just freeze—it shifts the moisture game. In fall, your garden isn’t only trying to stay warm; it’s trying to stay balanced. Too wet + too insulated can invite problems, while too dry can leave roots stressed when temperatures swing overnight.
For the US, I start with USDA hardiness zones and local frost dates. If your zone dips into long, steady cold, you can lean toward deeper coverage (within the 2–4 in / 5–10 cm range) and materials that insulate gently without holding water like a sponge. For Europe, where temperature patterns can vary widely by region and coastal influence, I use frost logic: if mornings are repeatedly freezing, it’s time to prepare—especially if rain is frequent.
Here’s the emotional truth behind “climate-smart mulch”: your goal is not to make plants cozy like a blanket. Your goal is to make them predictable—to reduce temperature spikes, moderate moisture, and protect crowns from harsh swings. When I’ve seen beds struggle, it’s often not the mulch brand; it’s that the mulch choice didn’t match the winter rhythm.
“The best mulch doesn’t fight winter—it rehearses with it, so roots can stay calm.”
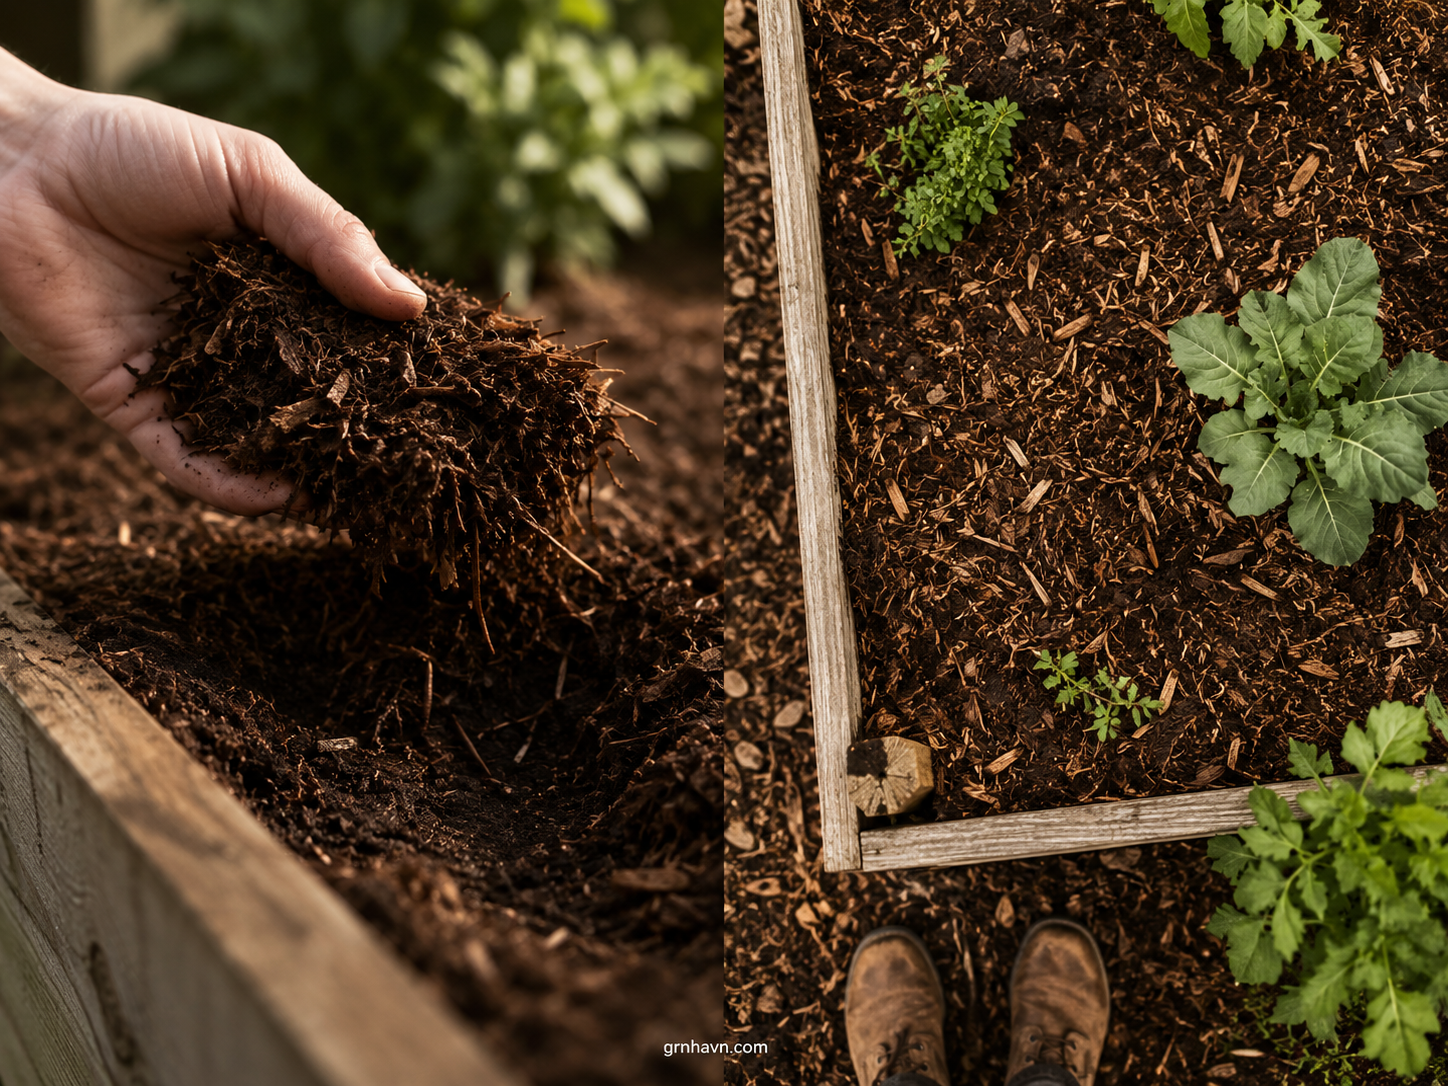
Organic Mulches (Straw, Leaves, Bark)
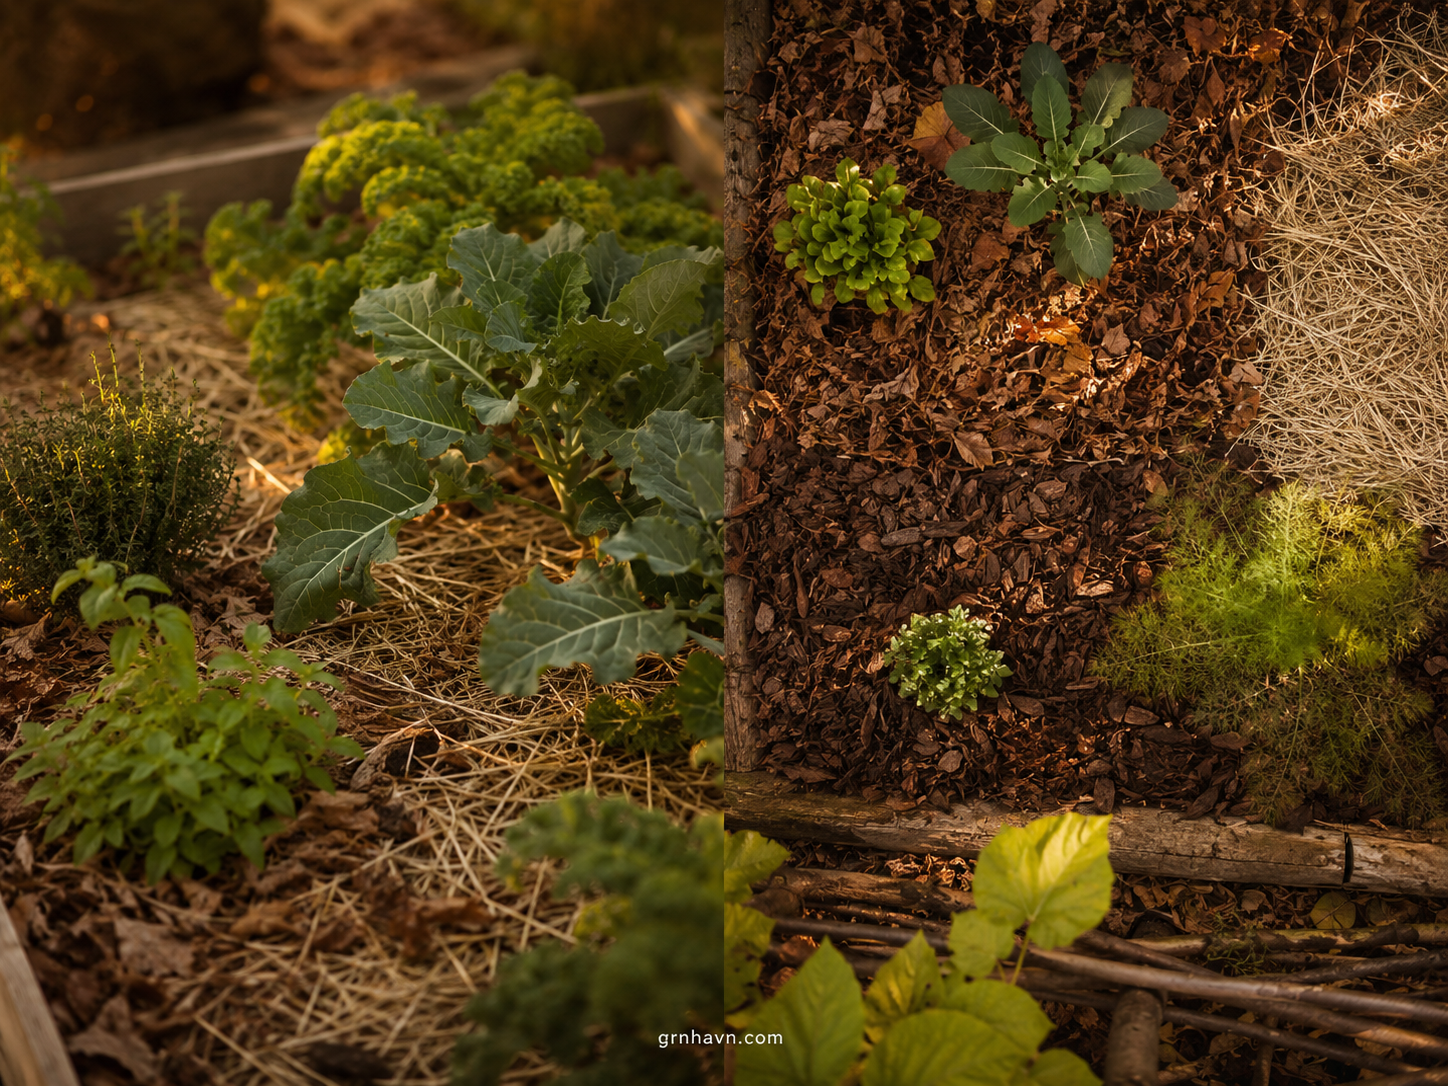
Organic mulch is where “slow magic” happens. Straw, leaves, and bark don’t just cover the soil—they feed it over time. I’m a fan because when organic material decomposes, it builds structure and supports soil life. But I’ll also be honest (the best-friend honesty): Organic Mulches can invite weeds if applied loosely or too early, and they can hold moisture differently depending on your texture and your winter rainfall.
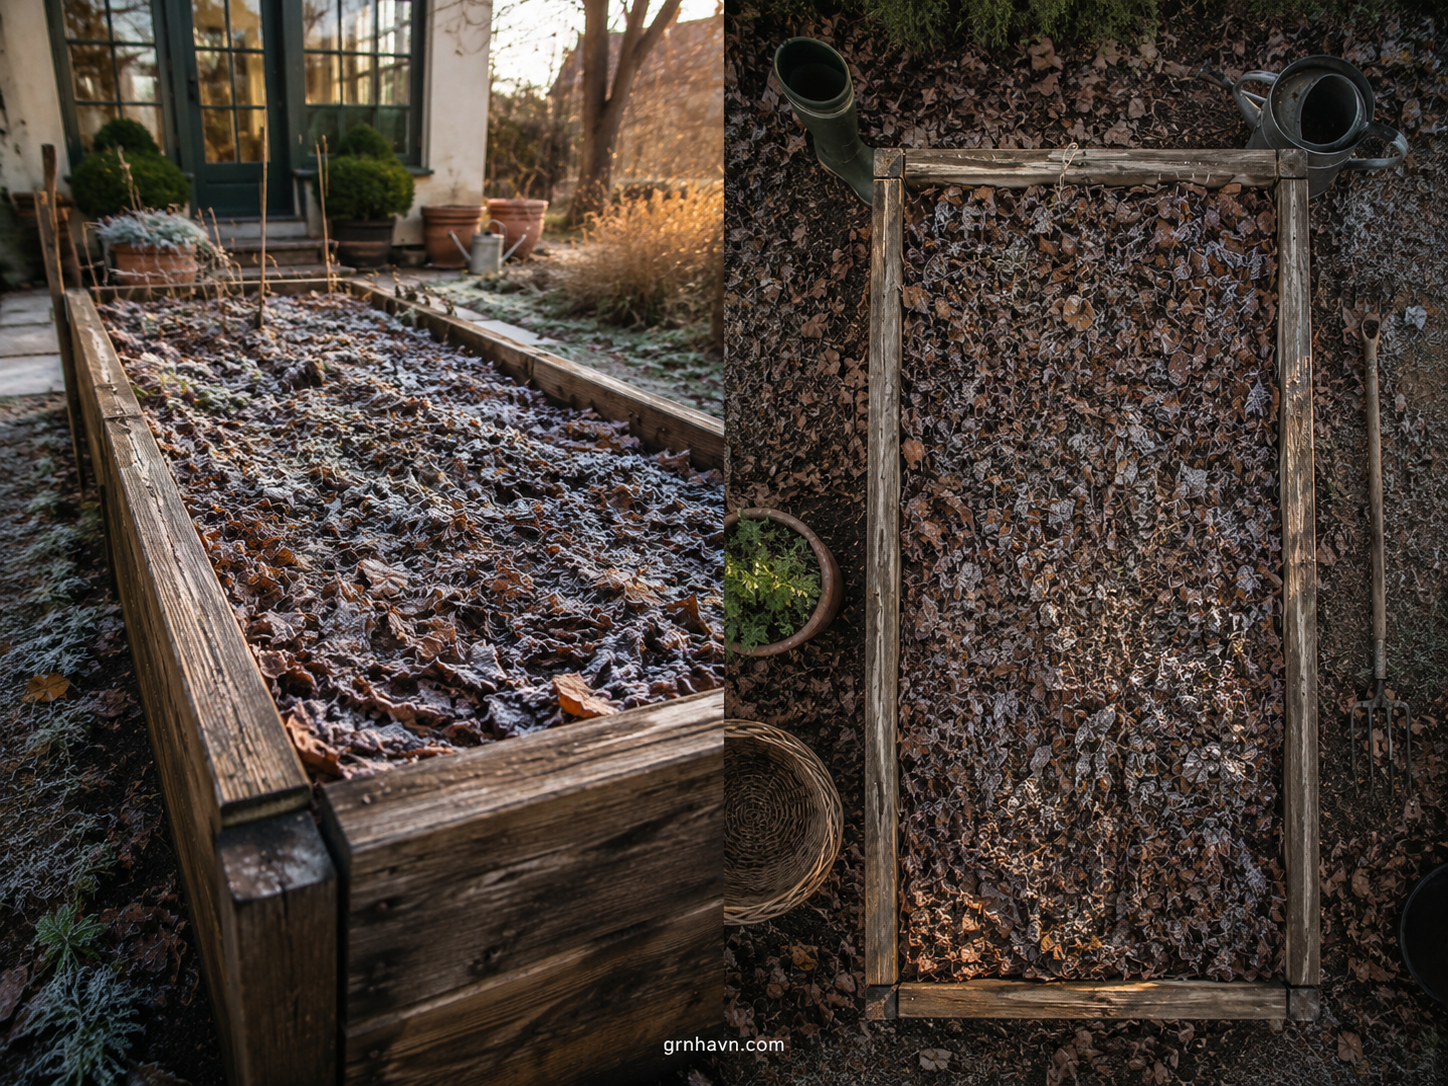
Straw is airy and great for insulating—especially when you want gentle protection and easy seasonal cleanup. Fallen leaves are excellent for moisture moderation and insulation, but shred them if you can; whole leaves can mat and reduce airflow. Bark is longer-lasting and decorative, yet it can be a bit heavier—so it works best when your bed already drains well.
Pros/cons in plain language:
✅ Decomposition: improves soil gradually.
✅ Insulation: moderates frost stress.
✅ Weed risk: can increase if the bed is already weedy or mulch is too thick too early.
⚠️ Moisture: in heavy wet winters, compacted organic layers can stay soggy.
“Organic mulch is like a thoughtful diary for your soil—one page at a time, season after season.”
You can often find shredded leaves, straw bales, or bark mulch at your local garden center, neighborhood home improvement store, or even during fall seasonal stock runs at grocery-adjacent shops. Quick tip: if you’re buying bark, grab a bag labeled for outdoor beds and check texture— smaller pieces settle and cover smoother.
If you prefer local sourcing, try nursery shops, local markets, or hardware stores for bulk options. For a “thrifty but smart” approach, ask about second-hand compost/leaf mulch availability and have supporting items ready like gloves, a wheelbarrow/bucket, and a hand rake.
For quick online shopping, compare options on Amazon or use the curated product comparison list below for hassle-free picking.
Inorganic Mulches (Gravel, Landscape Fabric Basics)
Inorganic mulch feels like a clean, structured solution—and in some gardens, it truly is. Gravel and certain landscape fabric approaches can reduce weeds and keep beds looking crisp through the colder months. But here’s my practiced opinion: inorganic mulches work best when your soil drainage is already strong and you don’t rely on mulch for soil-building.
Gravel helps with rapid drainage and stays in place, which can be a lifesaver in areas where winter rains are constant. Landscape fabric can be useful as a weed barrier, but it’s also easy to misuse—especially when plants need airflow and when roots need natural soil interaction. Over time, fabric can become a patchwork that weeds grow through anyway.
Pros/cons I’ve seen repeatedly:
✅ Weed control: strong when installed correctly.
✅ Moisture stability: often better drainage, less soggy beds.
⚠️ No soil feeding: less long-term organic improvement.
⚠️ Heat behavior: dark stones can warm in sun, then cool fast—watch microclimates.
⚠️ Removal: fabric can be annoying when you’re ready to replant.
If your winters are wet (common across parts of Europe and also many US regions), inorganic strategies can be the “calm” choice— but I still recommend thinking in layers: drainage first, then coverage, then plant health.
“A good inorganic mulch isn’t about blocking nature—it’s about directing it safely.”
When To Use / When Not To Use Mulch
Mulch can be a shield—or a problem—depending on timing and the specific needs of your plants. I treat it like nutrition: you wouldn’t give fertilizer like a blanket, and you shouldn’t “coat everything” without reading what the bed is already doing.
Use mulch when:
• You’re protecting perennials, shrubs, and established bed plants from temperature swings.
• Your bed is prone to drying out during shoulder seasons.
• Frost is consistent and the soil is cooling down (again: use US zone logic + Europe frost/temperature reality).
Be careful / avoid mulching when:
• Soil is still extremely warm and actively growing—late heavy coverage can slow things down.
• Your plants are wet crown-prone (some succulents and certain moisture-sensitive stems).
• You’re dealing with moldy, poorly draining spots where mulch layers may trap moisture.
• You’re mulching directly onto tender crown areas (plant rot risk).
One small “best friend” tip: always observe your bed for a week first. If the soil stays damp for days, choose materials and thickness thoughtfully. If it dries quickly, you may prioritize insulation without going too thick.
“The right mulch feels like you’re helping nature—not smothering it.”
Mulch Thickness Guide
Let’s talk depth—because mulch depth is where “almost right” becomes “actually right.” A thin layer may not protect roots through repeated freezing/thawing cycles. Too thick, and you can hold moisture too long and create a cooler, wetter microclimate around crowns.
Typical range: 2–4 in (5–10 cm) for most garden beds. If you’re in a colder region, you can lean toward the upper end, but only when drainage and plant type allow it. If you’re in a milder winter or you’ve got consistently wet seasons, choose the lower-to-mid range and pick materials that don’t mat into soggy layers.
Here’s how I decide thickness quickly:
• Dryer climates / lighter soils: closer to 3–4 in (7–10 cm) helps retain steadiness.
• Wet winters / heavier soils: closer to 2–3 in (5–7.5 cm) reduces moisture trapping.
• Organics like leaves: fluff and use shredded/mixed texture so airflow remains.
• Gravel: depth is more about coverage and weed control, but keep crowns safe.
In practical terms, the “golden feel” is even coverage with visible airflow at plant base (not packed mulch pressed against stems). Think of it as a protective quilt with breathable edges.
“Depth isn’t about more—it’s about the perfect buffer between freezing air and living roots.”
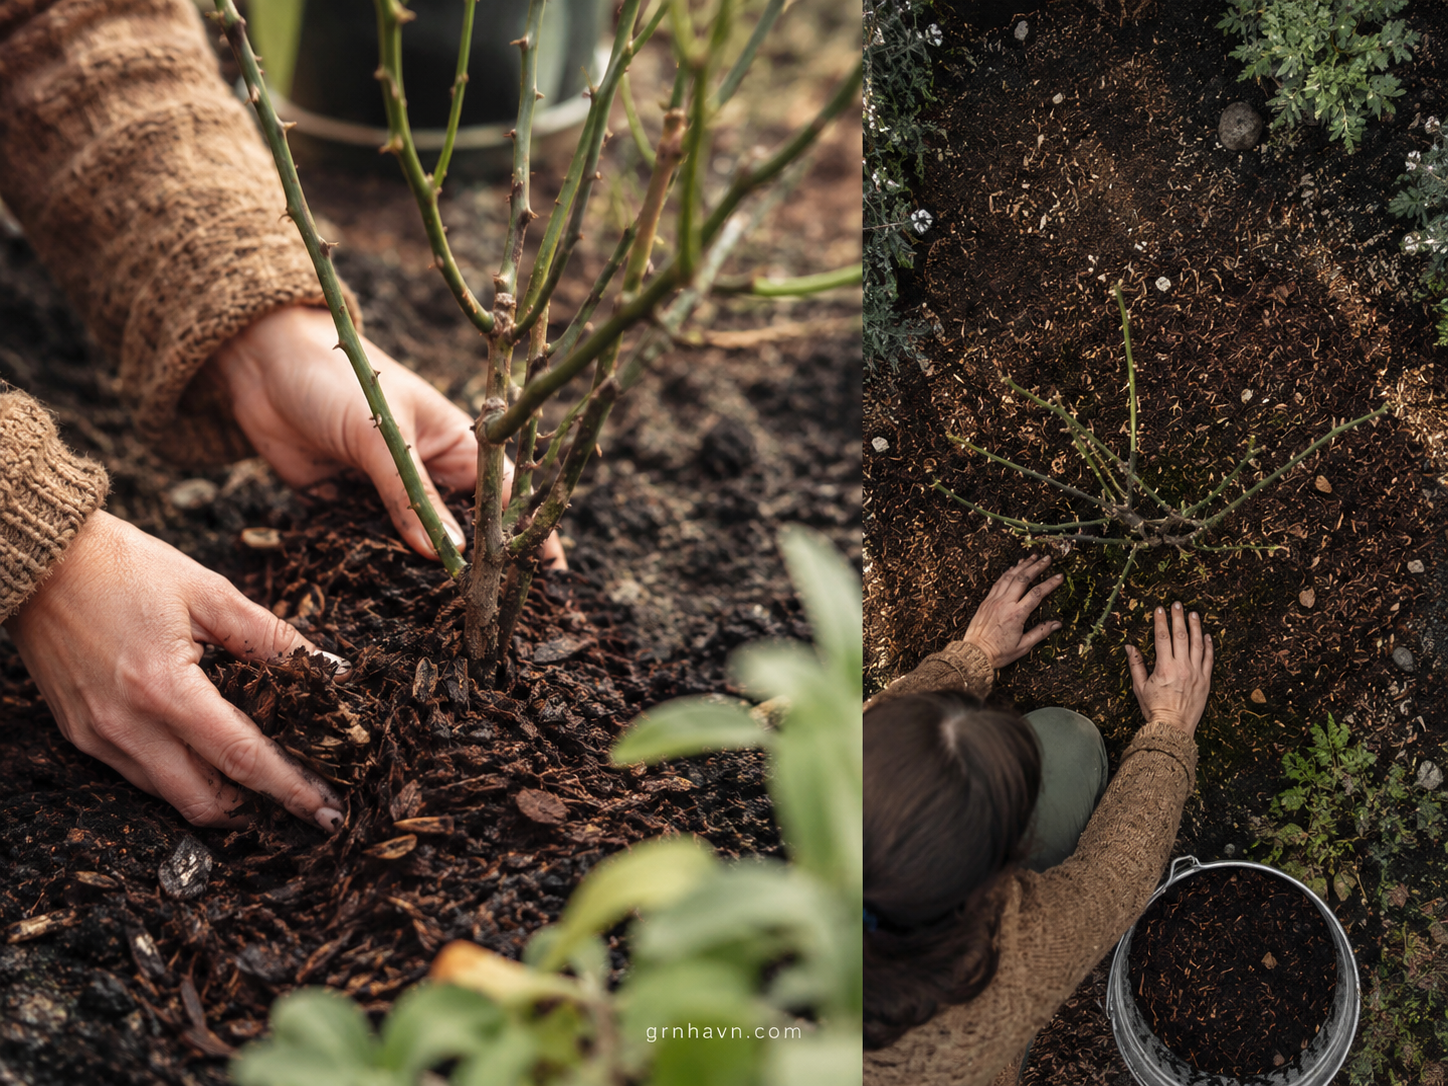
How to Apply Mulch Without Damaging Plants
This is the part I never skip—because it’s where most “mysterious” spring problems begin. When mulch touches the crown/stem directly, it can create a damp pocket that encourages rot. When mulch is piled too high on young plants, it can smother growth points.
Here’s the simple method that’s worked in my own beds and for clients:
1) Leave a gap around the crown/stem.
Create a small breathing space—think “a thumb-width ring,” not a trench.
2) Prep first (remove weeds, tidy debris).
Clear obvious weeds so mulch can work as protection, not as cover for chaos.
3) Spread evenly.
Use a rake or gloved hands to keep coverage consistent, especially if you’re mixing organic materials.
4) Avoid compacting.
If you press mulch down, you reduce airflow.
I also recommend checking the “feel” around stems after two days. If the mulch settles and touches the crown, top gently—but keep that gap.
“Mulch should look generous from above—and gentle up close.”
Mulch Timing: Before vs After First Frost
Timing is emotional, because you can feel uncertain: “If I mulch too early, will I invite weeds?” “If I wait too long, will roots suffer a cold shock?” Let me reassure you: there’s a practical middle path—one that works across regions if you read frost behavior.
In the US, many gardeners use zone guidance and local frost dates. In colder zones, mulching before deep freezing helps moderate the shift from warm soil to cold air. But if fall stays mild and damp, applying too early can reduce airflow and encourage surface weeds.
In Europe, where temperature swings and rain patterns can be intense (especially in shoulder seasons), I use frost-date logic more like a signal system. If nights are repeatedly dipping below freezing—consistently enough to matter— that’s when mulch becomes protection, not just decoration.
My friendly recommendation: apply mulch after the first frost when it marks a pattern, not just a one-off chilly night. If the first frost is followed by several weeks of warmth, you may choose a lighter layer or wait.
“Think of frost like a forecast, not a single event—mulch when the pattern becomes real.”
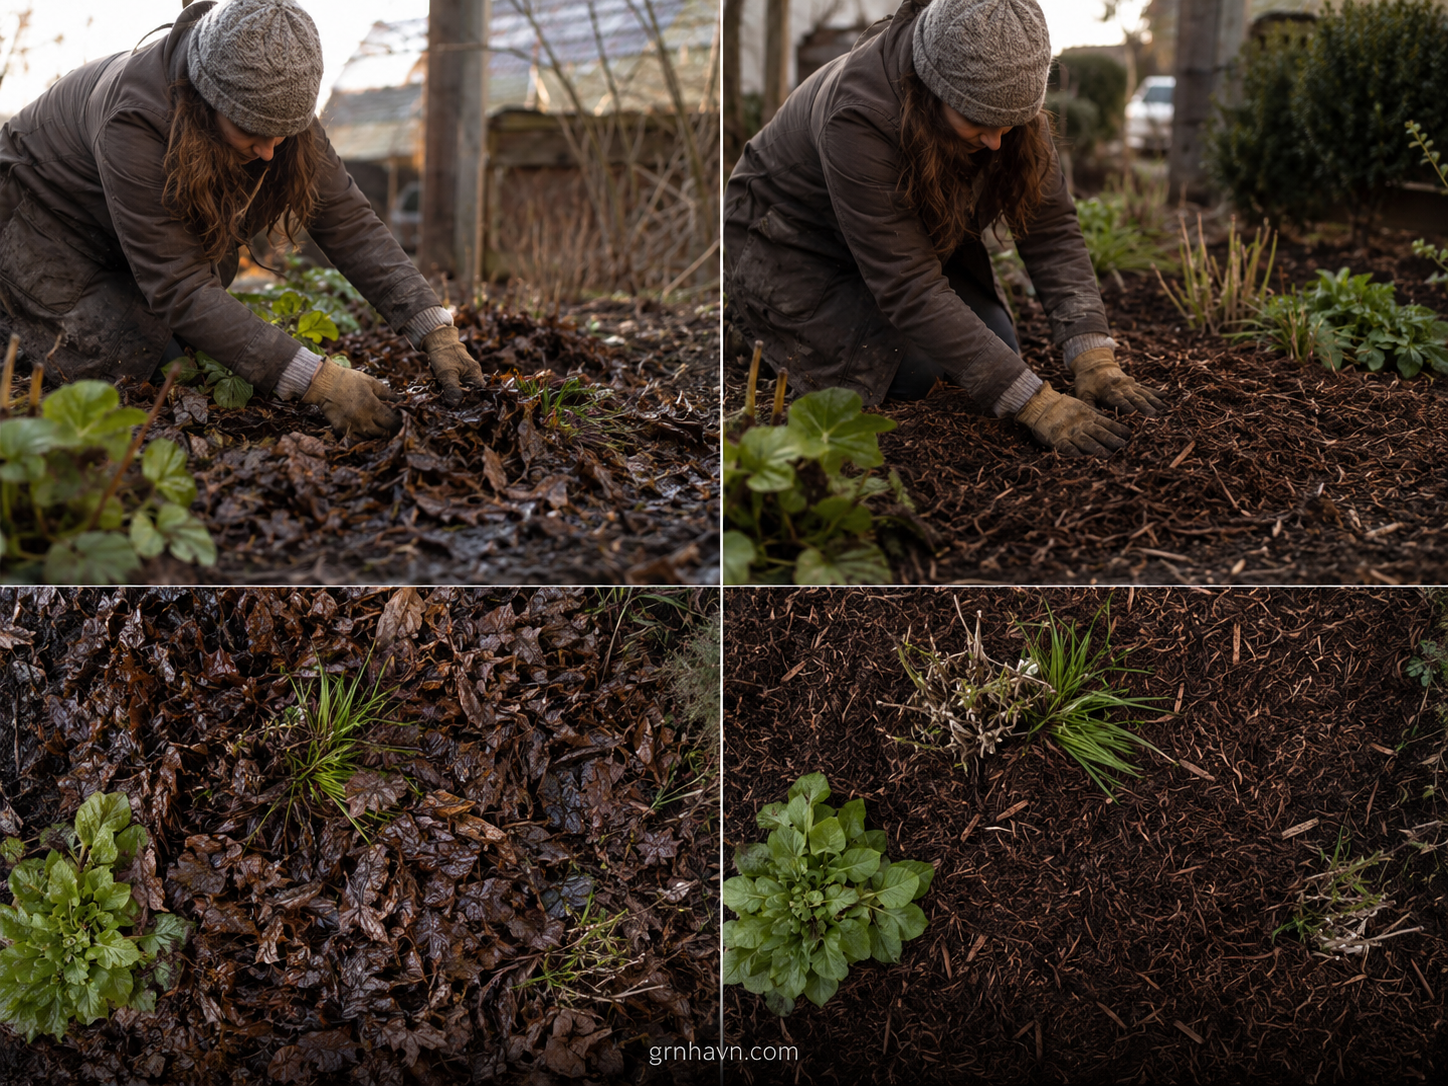
Remove/Refresh in Spring (Short Guide)
Here’s a secret that makes gardens look intentionally cared for: spring mulching is not the same job as fall mulching. In spring, your goal is to restore airflow, prevent lingering moisture, and give plants a clear path to reawaken.
When temperatures rise and days become consistently warmer, mulch can keep soil too cool. In heavy winter moisture areas, mulch can also hold onto dampness longer than you want. So I recommend a gentle spring refresh:
• Remove excess mulch from areas where crowns sit tight to the surface.
• Fluff if mulch has compacted (especially leaves).
• Top up lightly only where coverage thinned, keeping that crown gap.
A short, calming rule of thumb: when you can easily work the soil surface without it feeling soggy, it’s usually time to adjust. Don’t rush on the first warm day—watch the trend, not the headline weather.
“Spring mulch refresh is like smoothing your hair after winter—soft, light, and ready for what’s next.”
What Not to Do (Overwatering/Late Pruning)
Mulching doesn’t fix everything. If the bed is already overly wet, piling mulch can make conditions worse. If you prune too late, you can encourage tender growth just before cold weather tightens. And if you overwater in late fall, you’re basically adding extra work for the roots to survive.
Common “almost right” mistakes I want you to avoid:
• Overwatering late fall: especially right before heavy rain or freezing nights.
• Late pruning: trim at the right seasonal window for your plant type; don’t assume “anytime is fine.”
• Piling mulch against crowns: remember the gap rule.
• Mulching a weed-covered bed: you’ll just move the weeds into winter comfort.
Emotional gardening truth: it’s easy to want to “do more” when you’re worried. But winter doesn’t need frantic. It needs steady. If you do one thing right this season, make it the simple ones: spacing, timing, and moisture awareness.
“The garden doesn’t need panic care—just thoughtful care at the right moment.”
Common Mistakes (And How To Rescue Them)
Let’s normalize this: sometimes we mulch, and later we notice something feels off. I’ve had beds where the mulch settled and touched stems, where heavy rain turned leaves into a mat, or where a fabric barrier created frustration during spring cleanup. The good news? Most issues are fixable when you spot them early.
Here are the mistakes I see most often:
• Mulch piled too high on crowns/stems → gently pull back to restore airflow.
• Mulch applied too early during mild weather → fluff, thin if needed, and watch weeds.
• Organic mulch left unshredded (leaves mat) → lift, loosen, and re-spread airy texture.
• Moisture-blind choice (wrong material for wet winters) → reduce thickness and improve drainage where possible.
If you’re unsure, do a quick “touch test.” If the area stays cool and wet for days, your mulch may be too dense or too moisture-retentive. Adjust thickness rather than removing everything. Winter gardening is about gentle correction, not dramatic resets.
“Mistakes in winter aren’t failure—they’re information. We just adjust, calmly, with care.”
Final Printable Checklist
Before you close the garden for winter, use this quick checklist. It’s designed to be both practical and soothing—because the best feeling is knowing you did it right.
Depth + coverage
- Mulch thickness: 2–4 in (5–10 cm)
- Moisture aware: lighter layer in heavy wet winters
- Coverage is even, not packed down
Plant safety
- Gap around crown/stem (no direct piling)
- Weeds cleared first (so mulch protects, not hides chaos)
- Material fits your bed: drainage + plant type
Timing logic
- US: use zone + frost-date guidance
- Europe: follow frost/temperature pattern
- Consider applying after first frost when it becomes consistent
Spring refresh
- Fluff or remove excess mulch
- Restore airflow at crown areas
- Top up lightly only where needed
FAQ: Mulching For Fall & Winter
1) What are the best mulch types for garden beds in winter?
2) Should I mulch before or after the first frost?
3) How thick should mulch be for fall and winter?
4) Can I use leaves as mulch?
5) Is straw good mulch for winter protection?
6) Should I mulch newly planted seedlings or perennials?
7) Do inorganic mulches help during wet winters?
8) Will mulch attract pests or rodents?
9) What’s the biggest mistake people make with mulch in fall?
10) How do I apply mulch without damaging plants?
11) When should I refresh or remove mulch in spring?
12) Can mulch help prevent soil erosion over winter?
Final Verdict: Your Garden Doesn’T Need More— It Needs The Right Cover.
If you remember one thing, let it be this: mulch is a systems choice, not a simple covering. The best mulch types for garden beds are the ones that match your climate rhythm—your US USDA zones or your Europe frost/temperature reality—plus your bed’s drainage and your plants’ crown sensitivity.
From my own seasonal “before and after” moments, the biggest wins always come from thoughtful depth (usually 2–4 in / 5–10 cm), plant-safe spacing (never pile against crowns), and the calm timing that follows consistent cold rather than one scary forecast. Do that, and you’ll feel it in spring: the plants wake up steadier, the soil looks more intentional, and your garden feels cared for in a way that’s hard to fake.
You’re not just mulching—you’re coaching your garden through its hardest season with warmth, protection, and patience.
Want A Faster Winter Routine?
- Save this page, print the checklist, and revisit the crown-gap rule in spring.
- If you’re unsure about mulch type, start with climate-first logic (frost + moisture balance).